Product Details
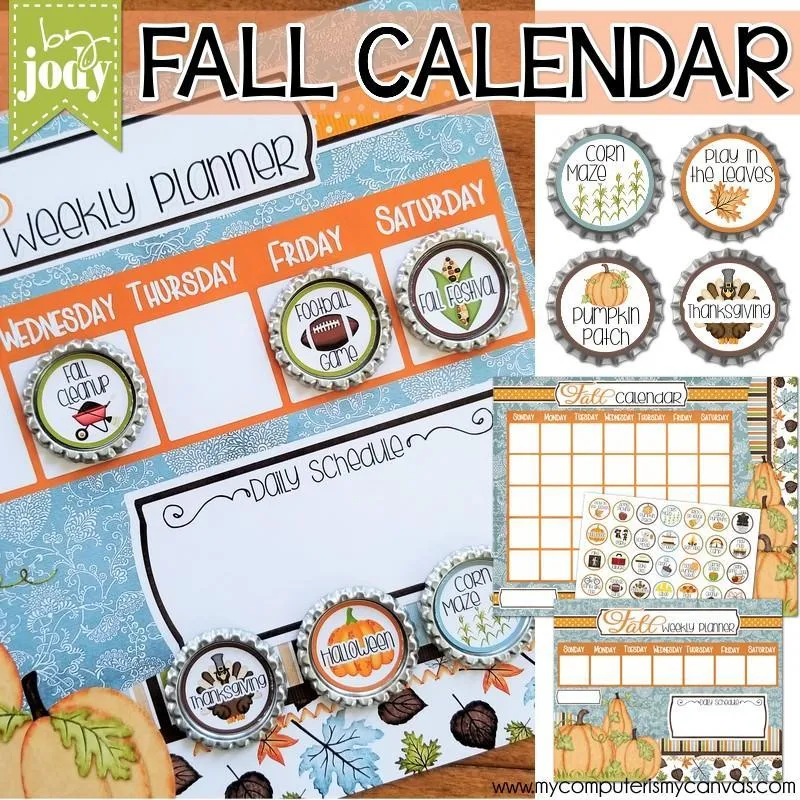
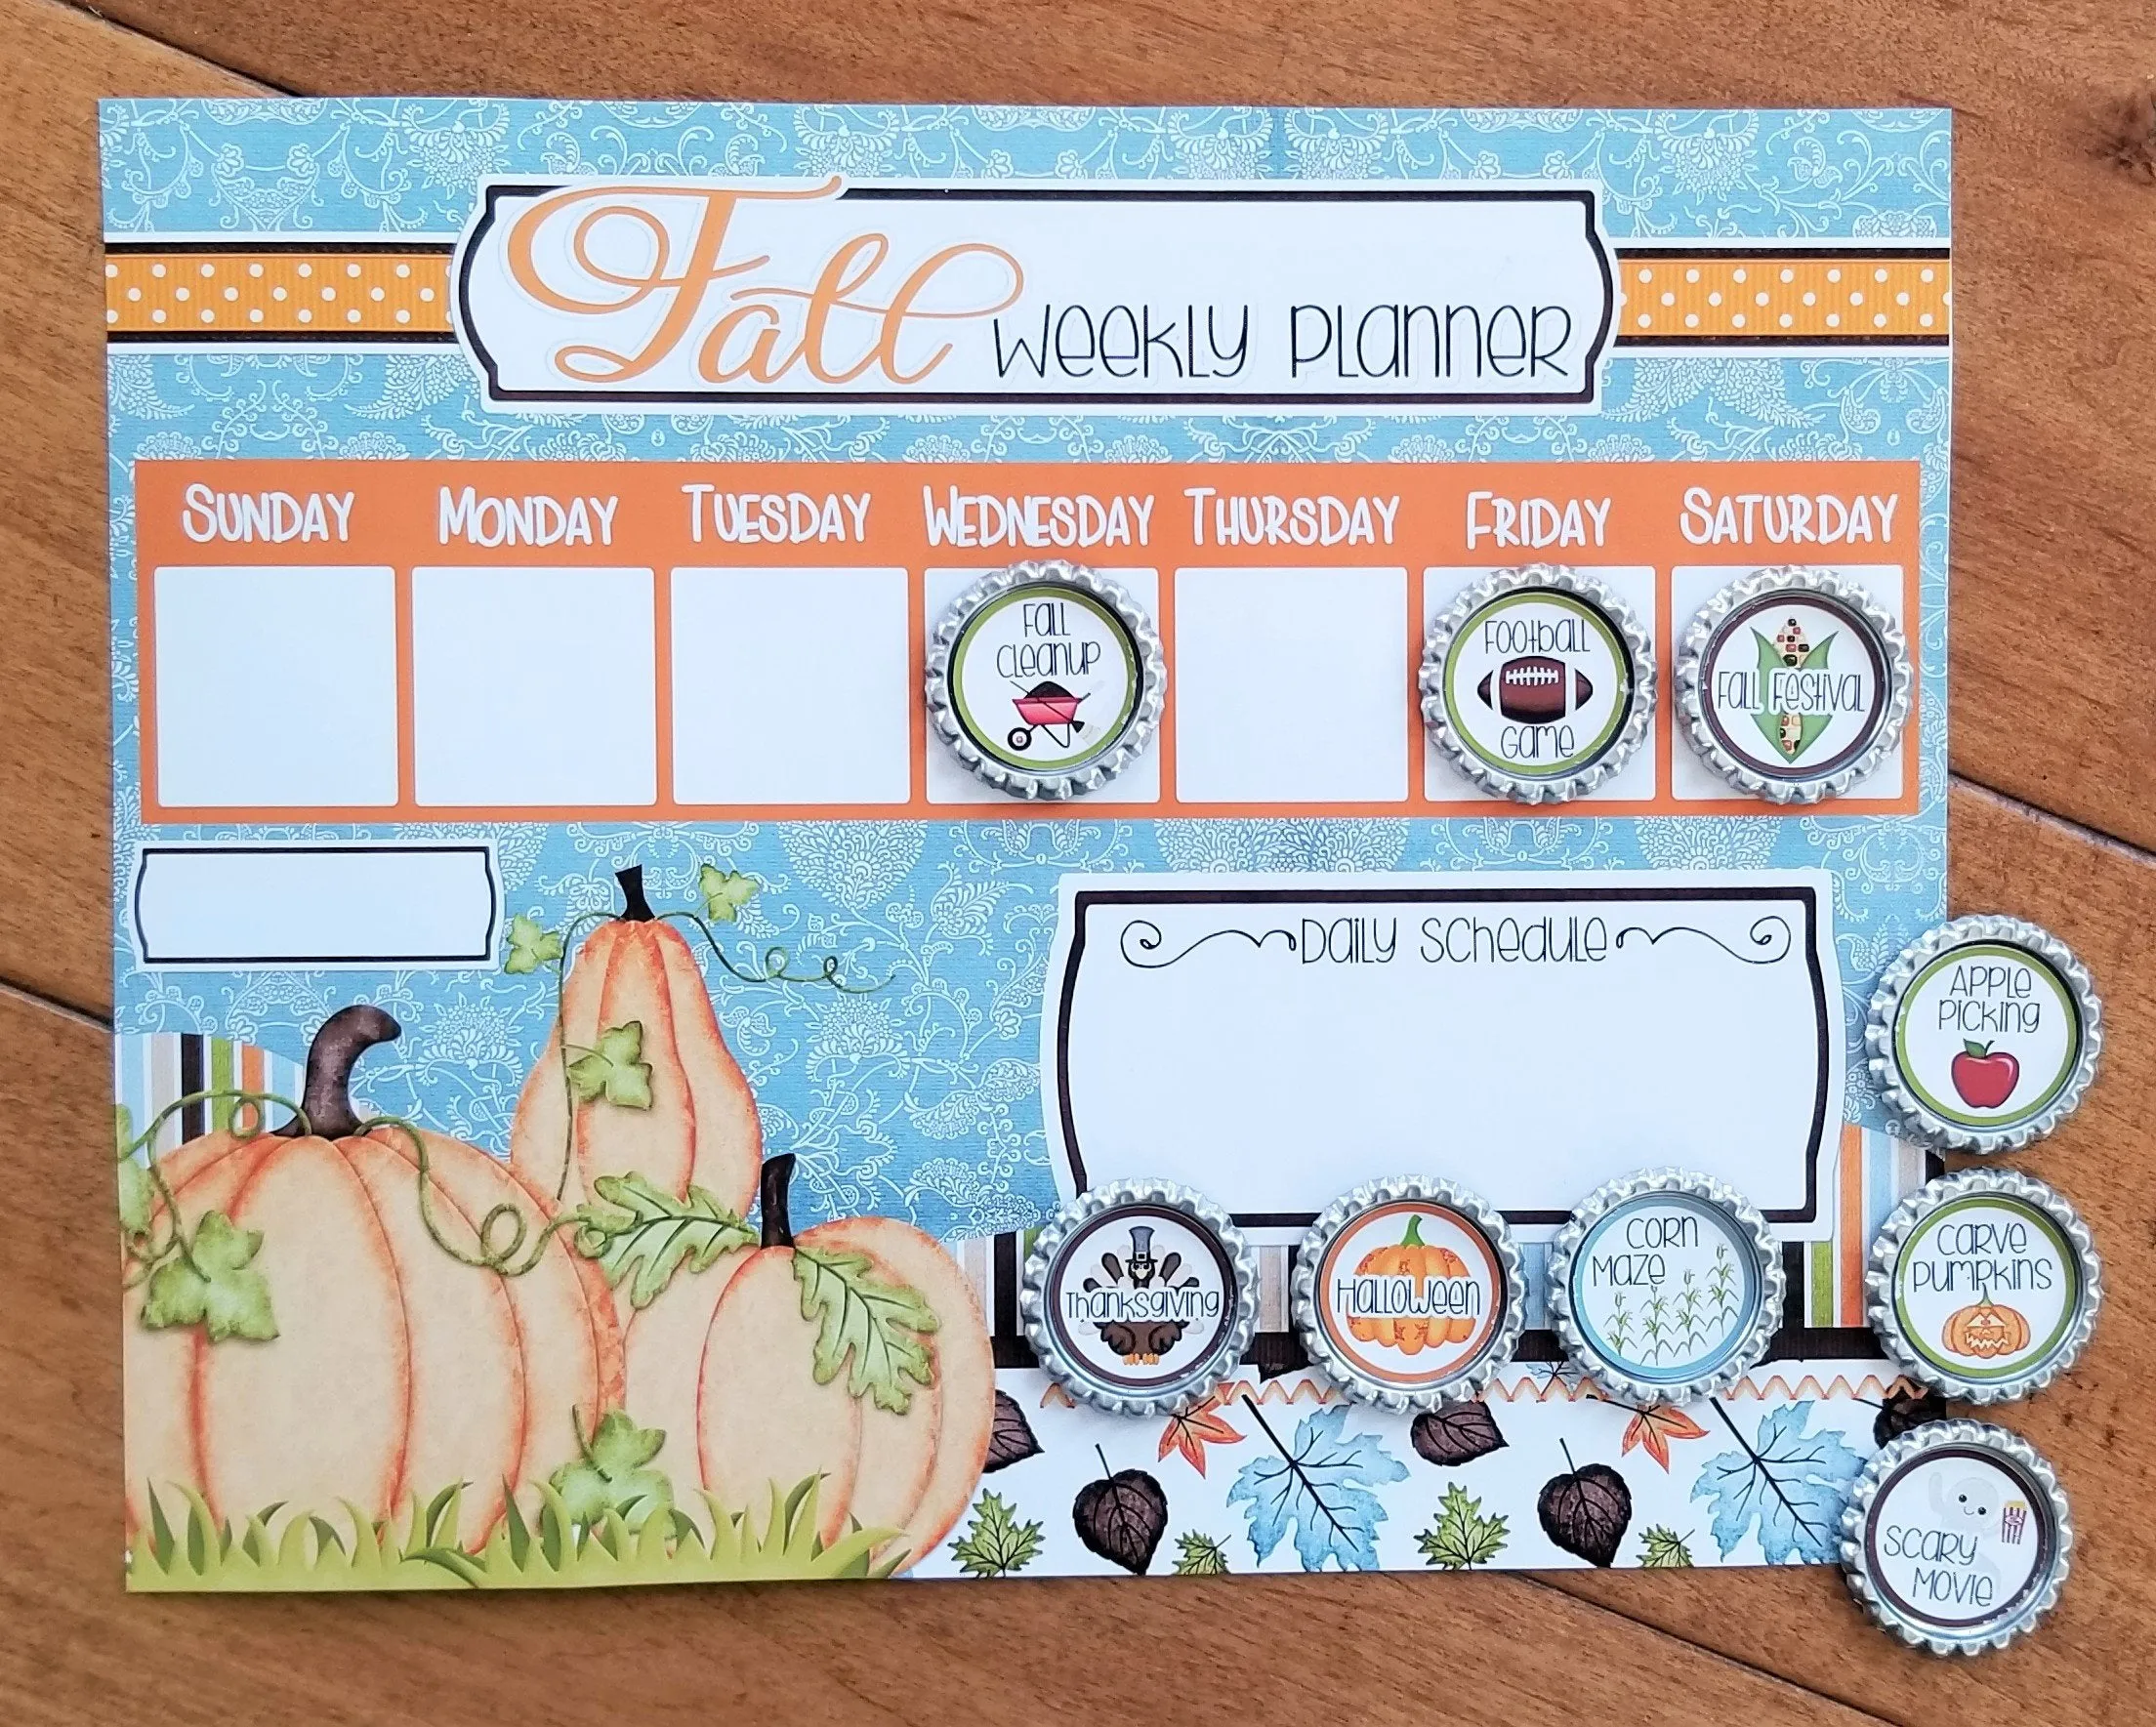
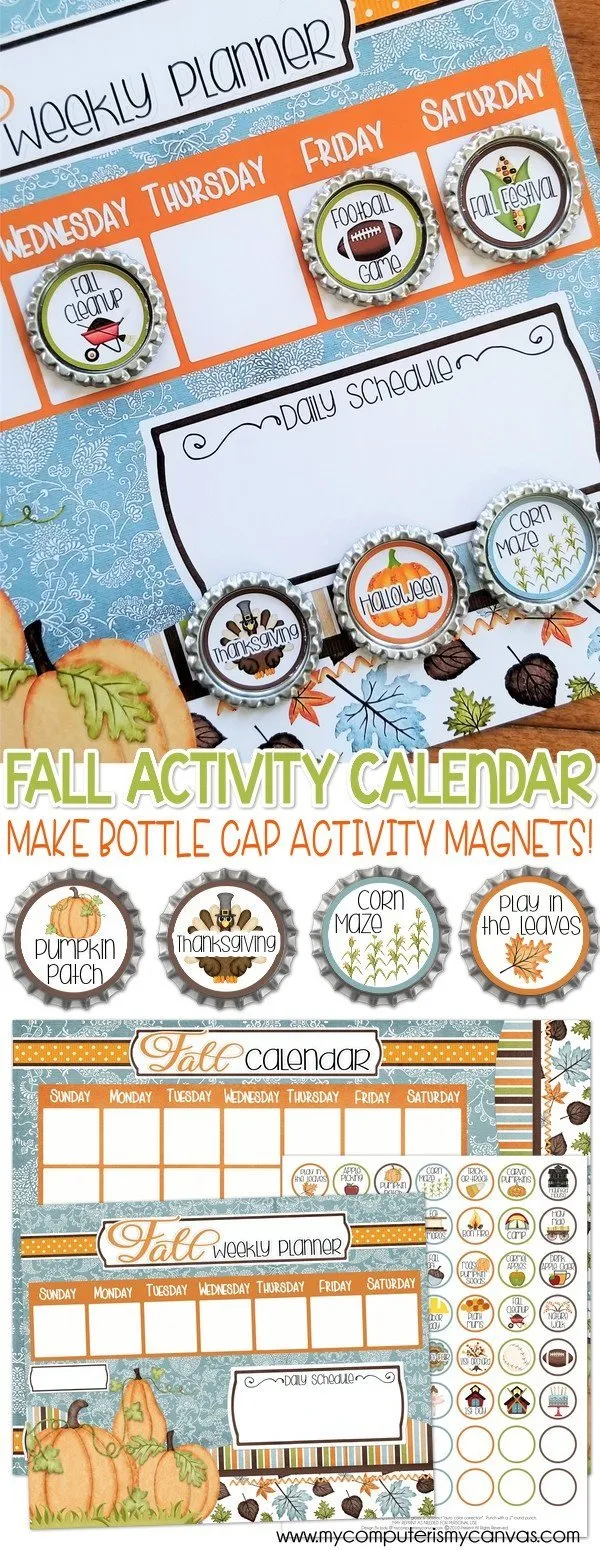
+Looking for a fun way to plan and display your Fall activity plans? This calendar is the PERFECT way to plan your week and/or your month with various activities! Let your kids see when "Pumpkin Picking" is scheduled, that a "Corn Maze" trip is planned and when your "Halloween Party" is coming up! Plan and move around these fun activity plans with a DARLING set of bottle cap magnets!
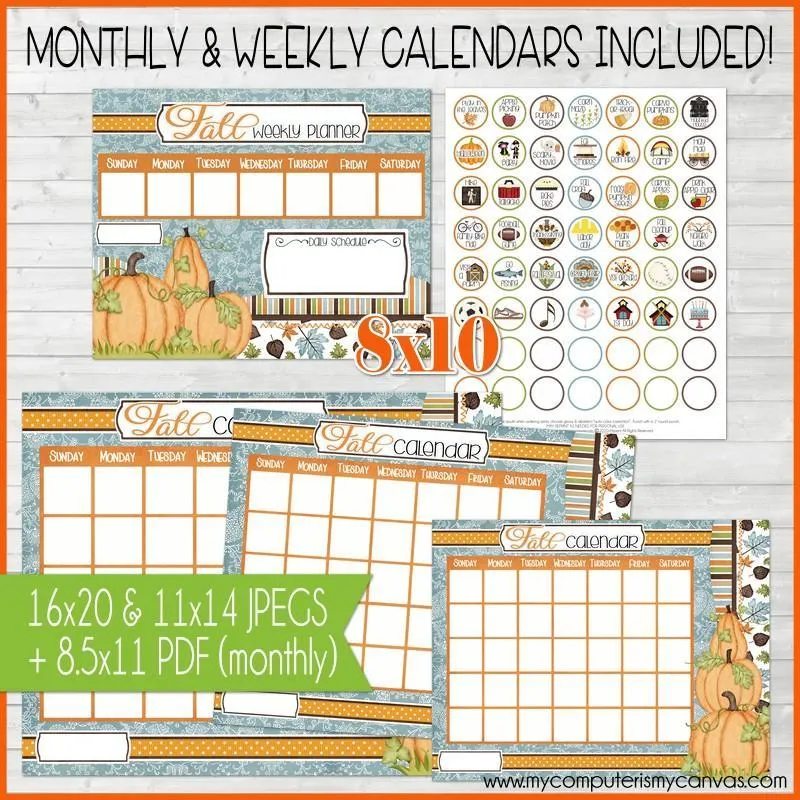
★ Calendar Sizes Included: 16x20 & 11x14 JPEG 8.5x11 PDF
★ Bonus: Weekly Planner! (Plan activities by week)
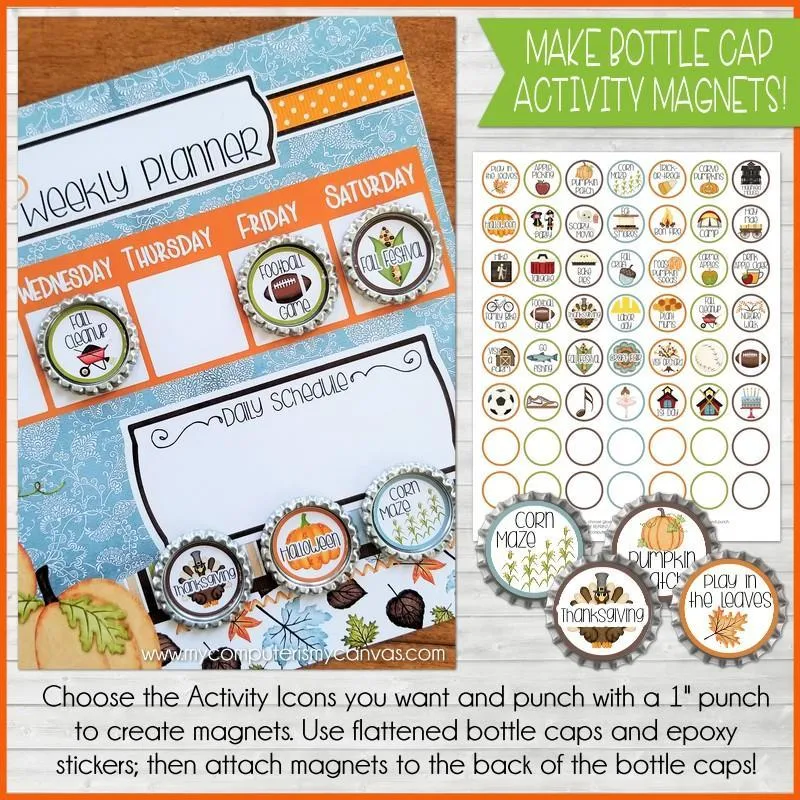
★ Make Bottle Cap Magnets (icon and text images included)
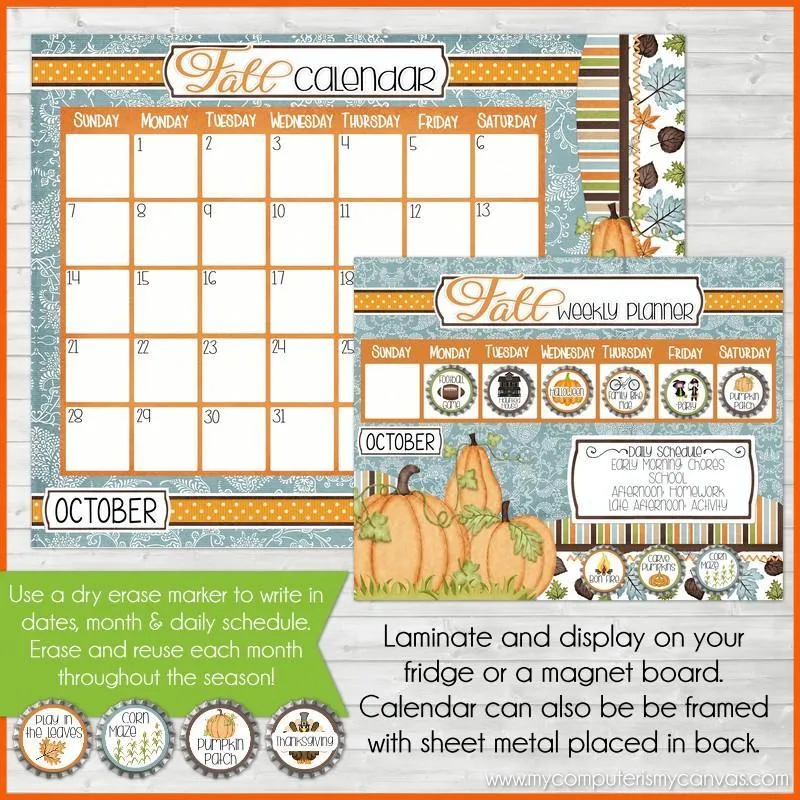
★ Laminate & use a dry erase marker for dates and extras
✱ SEE OUR ; includes the following 5 Calendar Sets: , , , &
INCLUDED IN THIS LISTING: This listing includes the Fall Activity Calendar (shown) as 16x20 and 11x14 JPEGS an 8.5x11 PDF. Two icon sheets are included (both as a standard PDF and as 8x10 JPEGS for photo printing). Each sheet has the same icons; one as an image/illustration and the other as text. Use the blanks for special activities, simply use the "add comment" function in Adobe Reader to add your own text on the PDF before printing or write on the blanks with a sharpie (using the blanks is optional).
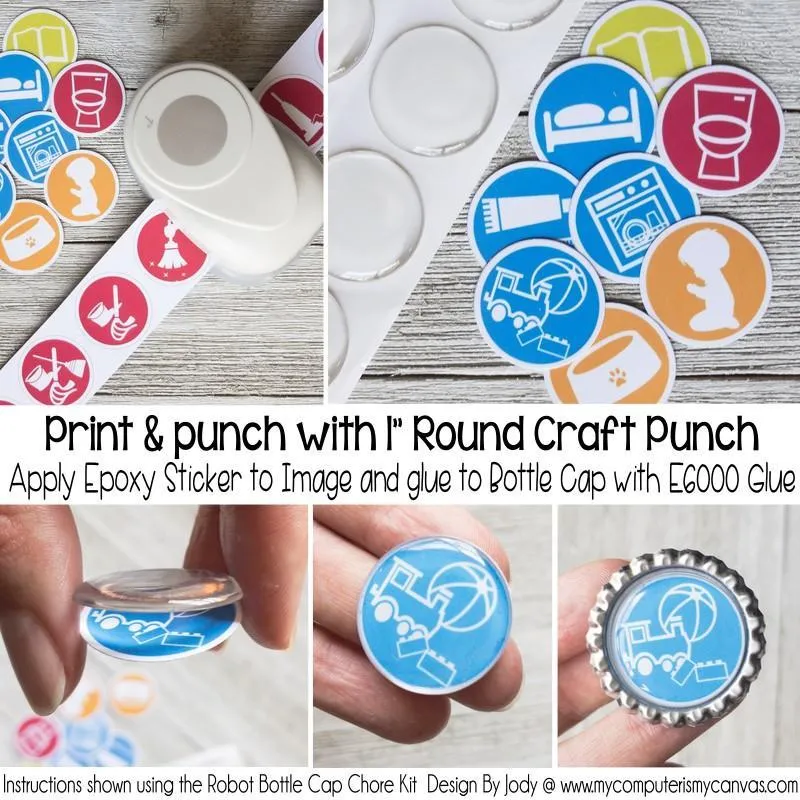
TIPS FOR PRINTING: For best results, order your preferred calendar size and 8x10 icon sheets from your favorite photo lab (OR print the PDF at home using glossy photo paper and your printer's best quality print setting). Icons can be punched with a 1" craft punch or trimmed with scissors. See tips for making bottle cap magnets below...
TIPS FOR YOUR CALENDAR: Simply laminate and display on your fridge with your activity magnets - use a dry erase marker to fill in dates and your daily schedule. Or... laminate and frame - just layer a piece of sheet metal behind the print to make it magnetic. (You can get sheet metal from Lowe's, then carefully use metal sheers to trim to the size of the frame. Not all sheet metal is magnetic, so test it with a magnet before you buy it).
TIPS FOR MAKING BOTTLE CAP MAGNETS: For best results, have the icon sheets printed as 8x10 photos at your favorite photo lab, then use a 1" punch to cut out the icons you want to use. Next, apply epoxy stickers to the icons and adhere them to FLATTENED bottle caps with E6000 glue (as it's specifically designed for using with metals). The fumes of this glue are very strong - so use caution, store away from children/pets and only use with care following instructions. Attach a round magnet to the back using the same glue. (see image #6 for a picture tutorial)
RECOMMENDED SUPPLIES (ad):
- 1" PUNCH (Amazon):
- BOTTLE CAPS (Fizzy Pops):
-----------------------------------------------------------------------------------
TERMS: Print as much as you'd like for yourself & to make gifts!
- Customer is purchasing printable/digital file
- Customer to print/assemble
- Personal Use Only (Gift Use & Fundraising OK)
- Customer CANNOT distribute, forward or share digital file
- Customer CANNOT sell items made from this printable
© 2010-Present ALL RIGHTS RESERVED
Commercial/Mass Printing Prohibited
✔ PDF's are 8.5x11 and can be printed at home or a copy shop
✔ I recommend using photo or glossy brochure paper for PDF's
✔ If printing at home, use your printer's BEST quality print setting
✔ JPEGS are formatted for printing at a photo lab
✱ DISCLAIMER: The Latter-day Saint themed products offered by MY COMPUTER IS MY CANVAS are neither made, provided, approved nor endorsed by Intellectual Reserve, Inc. or The Church of Jesus Christ of Latter-day Saints. Any content or opinions expressed, implied or included in or with the goods offered by MY COMPUTER IS MY CANVAS are solely those of MY COMPUTER IS MY CANVAS and not those of Intellectual Reserve, Inc. or The Church of Jesus Christ of Latter-day Saints.
| | |



![Wood - Our Lady of Fátima [Several sizes] Wood - Our Lady of Fátima [Several sizes]](https://www.glitzfab.com/image/wood-our-lady-of-fátima-several-sizes_KTJ7Mp_285x.webp)
